MCP Proxy
MCP Proxy
Aggregates all available MCP (Model Context Protocol) tools in the Chatspeed system into a unified proxy entry point, completely solving the pain point of repeatedly configuring tools across different IDEs.
Chatspeed's CCProxy module provides the MCP Proxy as a solution to the aforementioned fragmented MCP management. It aggregates all MCP tools installed in Chatspeed into a flattened structure and provides unified access entry points via multiple protocols. This means you only need to install your MCP tools in Chatspeed once, disable the ones you don't need, and then you can access all your MCP tools via any of the following protocols:
- Streamable HTTP Protocol:
http://localhost:11435/mcp/http(Recommended) - SSE Protocol:
http://localhost:11435/mcp/sse
Please note that the port
11435used in the MCP URLs in this chapter is the default port of the CCProxy module. If you have modified the default port, please update the port configuration in your configuration files accordingly.
🔧 Why You Need an MCP Proxy
Developers often use multiple AI IDEs or AI plugins, and each AI IDE or AI plugin typically requires the installation of some common MCPs to extend the AI's capabilities. Some common MCPs are installed in almost every IDE, such as context7, tavily-mcp, etc. Reinstalling the same MCP tools every time you switch IDEs becomes tedious.
Before Using the CCProxy Module's MCP Proxy
- Individually install MCP tools in
VS Code❌ - Repeatedly configure the same tools in
Cursor❌ - Duplicate setup for
Claude Code❌ - Duplicate setup for
Gemini CLI❌ - Repeatedly install the same MCP tools for
Trae,Cline,Roo Code, etc. ❌
After Using the CCProxy Module's MCP Proxy
- Simply install all necessary MCP tools on
Chatspeed✅ - The CCProxy module provides all aggregated MCP tools via SSE protocol (
http://localhost:11435/mcp/sse) ✅ orStreamable HTTPprotocol (http://localhost:11435/mcp/http) ✅ - Configuring MCPs in all IDEs or plugins becomes very simple: just select the appropriate protocol, and configure it to the corresponding URL ✅
- Adding, removing, and modifying tools can all be completed centrally in the
Chatspeedclient ✅
🌐 Chatspeed's MCP Proxy Architecture
🛠️ Server-side Installation and Configuration
Installation
Please download and install the latest version of Chatspeed from the official Chatspeed website. For details, you can refer to the User Guide.
MCP Proxy Configuration
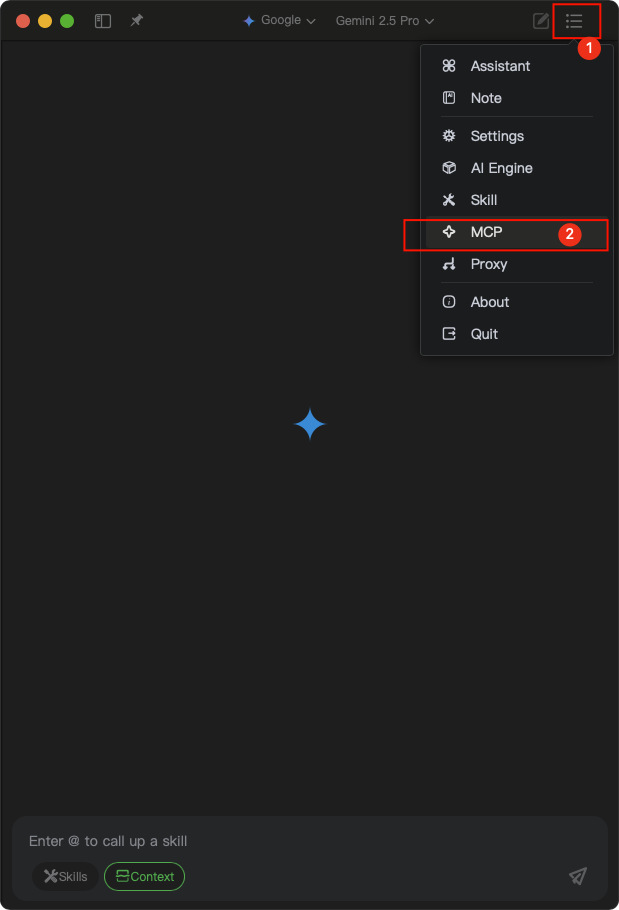
- Open the MCP configuration options by clicking "MCP" in the top-right corner of the main interface in Chatspeed, and click in the numerical order indicated in the image below:
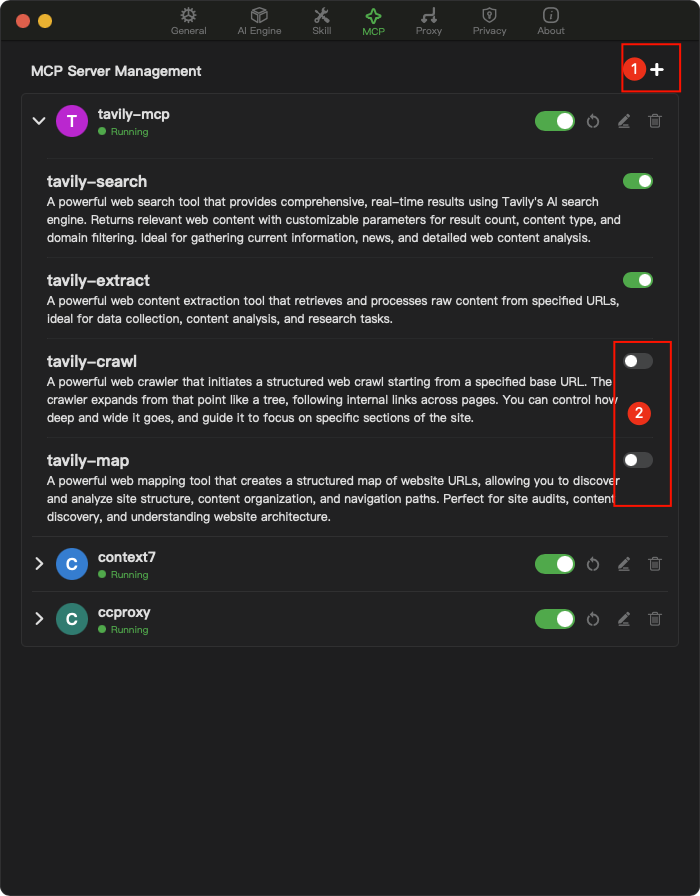
- In the MCP configuration interface, add the necessary MCP tools, such as context7, tavily-mcp, etc. For tools you don't need, you can disable them (as indicated by number 2 in the image below).
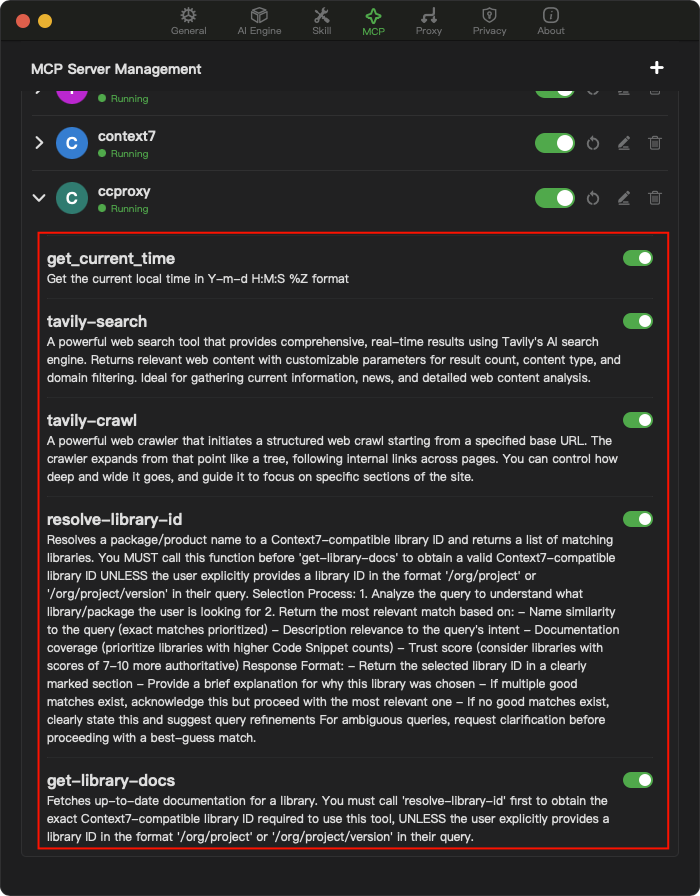
After the above configuration, you will have the following MCP tools:
⚙️ MCP Client Configuration
General Configuration
Usually, the configuration formats of different MCP clients vary slightly, but generally look like this:
Streamable HTTP Protocol Configuration (Recommended):
{
  "mcpServers": {
    "ccproxy": {
      "type": "http",
      "url": "http://localhost:11435/mcp/http"
    }
  }
}
SSE Protocol Configuration:
{
  "mcpServers": {
    "ccproxy": {
      "type": "sse",
      "url": "http://localhost:11435/mcp/sse"
    }
  }
}
Note: Chatspeed's MCP Proxy implementation of the
Streamable HTTPprotocol provides better connection stability and remains available after network disconnections or computer sleep (suspend), and is recommended for priority use in supported clients.
Claude Code
- The following will install to the user scope, making it available in all projects:
claude mcp add -t http -s user ccproxy http://localhost:11435/mcp/http- If you only want to install for the current project, enter the project directory, then use the following command to install:
claude mcp add -t http ccproxy http://localhost:11435/mcp/http- After installation, verify using
claude mcp get ccproxy. If the output is as follows, the installation was successful:
> claude mcp get ccproxy
ccproxy:
  Scope: User config (available in all your projects)
  Status: ✓ Connected
  Type: http
  URL: http://localhost:11435/mcp/http
Gemini CLI
The MCP configuration for Gemini CLI is exactly the same as the Claude Code commands, just change claude to gemini.
- Global installation
gemini mcp add -t http -s user ccproxy http://localhost:11435/mcp/http- Project installation, please enter the project directory first and then execute the following command:
gemini mcp add -t http ccproxy http://localhost:11435/mcp/http- After configuration, verify using
gemini mcp list. Output similar to the following information indicates successful installation:
> gemini mcp list
Configured MCP servers:

✓ ccproxy: http://localhost:11435/mcp/http (http) - Connected
For more configuration information, please refer to this guide.
Qwen Code
Qwen Code is a fork of Gemini CLI, so the installation commands are exactly the same as Gemini CLI.
- Global installation
qwen mcp add -t http -s user ccproxy http://localhost:11435/mcp/http- Project installation, please enter the project directory first and then execute the following command:
qwen mcp add -t http ccproxy http://localhost:11435/mcp/http- After configuration, verify using
qwen mcp list. Output similar to the following information indicates successful installation:
> qwen mcp list
Configured MCP servers:

✓ ccproxy: http://localhost:11435/mcp/http (http) - Connected
VS Code
You can follow the MCP installation guide using the standard configuration above. Alternatively, you can use the VS Code CLI to install the CCProxy MCP tool:
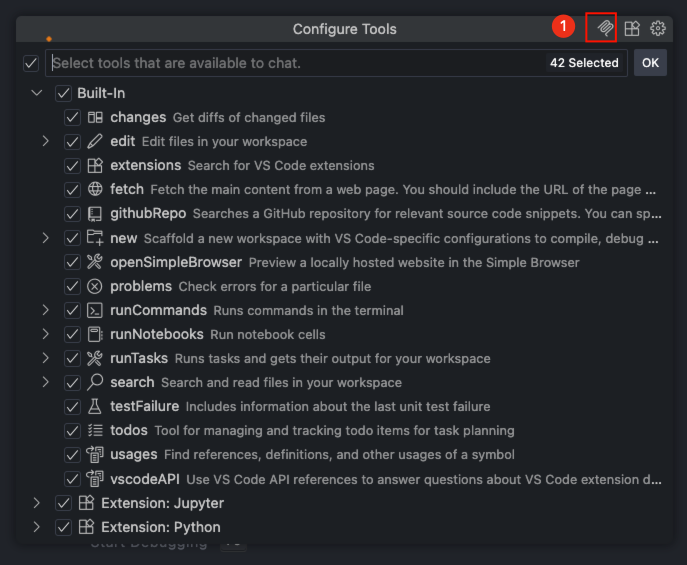
Steps for GUI Installation
- Click the configuration button in the image below
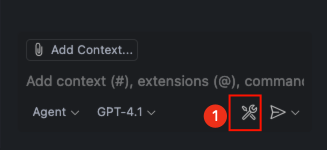
- Click the MCP configuration button in the image below
- Select "HTTP(HTTP or Server-Sent Events) Connect to a remote HTTP server that implements the MCP protocol"
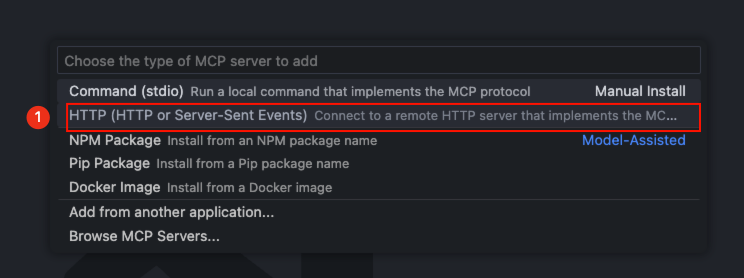
- Enter
http://localhost:11435/mcp/httpand press Enter

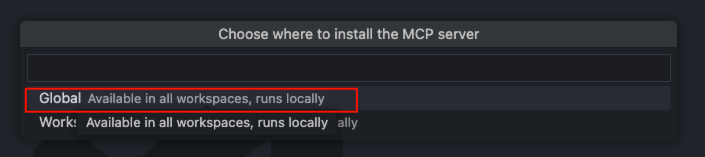
- Enter the MCP server name
ccproxyand press Enter

- Select global or current workspace, global configuration is recommended
Command Line Installation
code --add-mcp '{"name":"ccproxy","type":"http","url":"http://localhost:11435/mcp/http"}'Cursor
Go to Cursor Settings -> Tools & Integrations -> MCP Tools -> Add new MCP Server. Add the following information to the configuration:
{
  "mcpServers": {
    "ccproxy": {
      "url": "http://localhost:11435/mcp/http"
    }
  }
}
Trae CN
Go to Trae CN's AI Function Management -> MCP -> Add -> Manual Add. Add the following information to the configuration and save:
{
  "mcpServers": {
    "ccproxy": {
      "url": "http://localhost:11435/mcp/http"
    }
  }
}
Windsurf
Windsurf's MCP server configuration file is located at ~/.codeium/windsurf/mcp_config.json. This is a JSON file that contains a list of servers that Cascade can connect to. The JSON should follow the same pattern as the Claude Desktop configuration file.
You can open ~/.codeium/windsurf/mcp_config.json and add the following content:
{
  "mcpServers": {
    "ccproxy": {
      "serverUrl": "http://localhost:11435/mcp/http"
    }
  }
}
Note, if you have multiple MCP tools, just add the
ccproxysection, like:
    "ccproxy":{
      "serverUrl": "http://localhost:11435/mcp/http"
    }
Cline
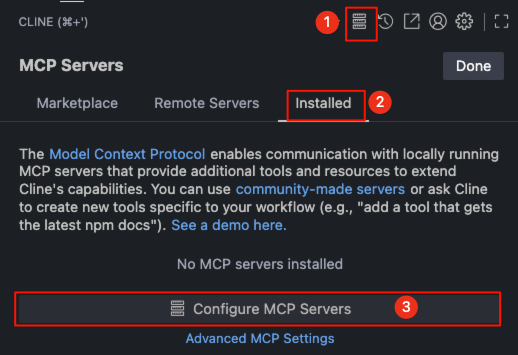
- Please click the button labeled number 1 to enter the MCP setting interface, then click the button labeled number 2 to switch to the "Installed" interface, and finally click the button labeled number 3 to enter the MCP code configuration interface. Copy the following code into the code editor and save:
{
  "mcpServers": {
    "ccproxy": {
      "type": "streamableHttp",
      "url": "http://127.0.0.1:11435/mcp/http"
    }
  }
}
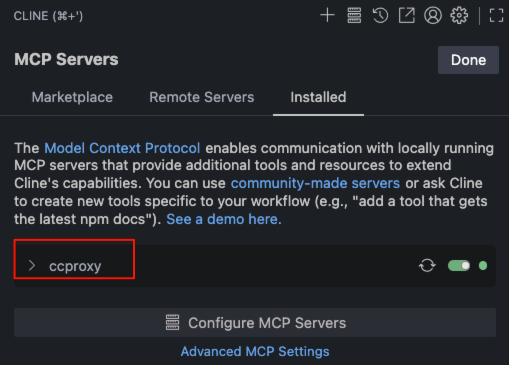
- After saving the code, you can see that
Cline's MCP server list already hasccproxy's MCP tools.
Roo Code
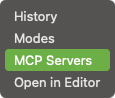
- Click the button labeled number 1

- Select "MCP Servers" from the dropdown menu
- You can click the button labeled number 1 to add a global MCP or click the button labeled number 2 to add a project MCP
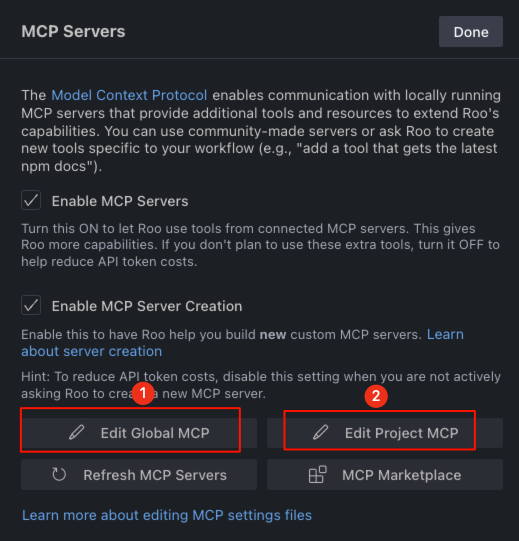
- Add the following content to the opened code editor and save:
{
  "mcpServers": {
    "ccproxy": {
      "type": "streamable-http",
      "url": "http://localhost:11435/mcp/http"
    }
  }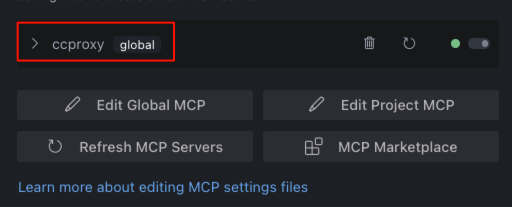
}- Now you can see
ccproxy's MCP tools in theRoo CodeMCP server list.
Crush
Crush's configuration file name can be .crush.json or crush.json. On linux/macOS, the configuration file path is $HOME/.config/crush/crush.json, and on windows, the configuration file path is %USERPROFILE%\AppData\Local\crush\crush.json.
This article takes macos as an example, please edit $HOME/.config/crush/crush.json, create one if the file does not exist, put the following code into the mcp configuration block:
{
  "ccproxy": {
    "type": "http",
    "url": "http://localhost:11435/mcp/http"
  }
}
A complete configuration example is as follows:
{
  "$schema": "https://charm.land/crush.json",
  "mcp": {
    "ccproxy": {
      "type": "http",
      "url": "http://localhost:11435/mcp/http"
    }
  },
  "providers": {
    "Chatspeed": {
      "name": "Chatspeed",
      "base_url": "http://localhost:11435/compat_mode/v1",
      "type": "openai",
      "api_key": "your_api_key",
      "models": [
        {
          "name": "gemini2.5-pro",
          "id": "gemini2.5-pro",
          "context_window": 1000000,
          "default_max_tokens": 8192
        }
      ]
    }
  }
}